Just as we were gearing up for our whirlwind work weekend (say that 3 times fast!) at the cottage, Mum's gimpy lymphedema-plagued arm flared up with an infection and we had to whisk her off the island to get her pumped full of antibiotics a.s.a.p.
Poor Mum.
She was so worried about letting us down and not being a part of all the cottage work, while everyone else was too busy worrying about her to give a rat's patoot about the cottage!
She spent the rest of the weekend resting at home and is recovering nicely.
Tuesday, May 25, 2010
Monday, May 24, 2010
One! ah, ah, ah....
We've finally finished a room at the cottage.
Finished might be a matter of perspective. I still want to work on the quarter-round trim that can't be installed on the baseboards because the gap between the baseboard and the floor is so great the quarter-round slips beneath it. *exasperated sigh*. And.... we really need to get an electrical outlet into that room.But other than those two things, this room is D-U-N, dun.
Without further ado, I give you......... the bunk room! [oooo...... ahhhhhh!]
OK... So I'm feeling a little proud of myself with this one. I love this room! The kids love it too. For the longest time it was the only clean and tidy spot in the whole cottage. It was their refuge. I would sneak off to lie down on their new clean gooshy mattresses.
Some fun details in this room include the magazine racks installed with each bed. There isn't room in this 8'x8' closet of a room to allow for any kind of a bedside table, so these allow the kids to store their DSs (or, if you're a devious sneak like my son, the plastic bag from the chips you stole from the kitchen without asking.)
I got the idea for these here. I had the ladder trim left over from our old house in Kanata, and asked Handy Dad to cut out the side boards for me from some scrap lumber I had in the garage. Ask for cut boards, get back beautiful fabricated, filled, and sanded finished magazine racks. I just slapped a bit of paint on them to make them match the bed.
I even hung the wah wah wahhhhh seashell wall art. You know what? They're not totally awful. I might have to keep them.
OK. Time for a quick Sarah Richardson-esque cost breakdown for this room:
Mattresses $170 x2 @ IKEA = $340
Flooring*: 3 boxes @ $35.76/box (we didn't use all three, but we needed more than 2) = $108
quilts - $32 x 2 = $64 - bed bath and beyond
magazine racks = FREE! - Handy Dad
wall paint = about $45/gallon, but I only used half, so let's say $23 - Benjamin Moore
bed paint = dang, can't remember! Let's call it $15. - Benjamin Moore
stars = $9 - White Feather
frames = $7 - Dollarama
birds = $5 ea. - Michael's clearance aisle. Score!
book box thing - urg...I think $10 - Michael's
dresser - Free - donated, formerly in D's "baby" room
Curtain - $7: fabric: IKEA (half meter), hardware: Fabricland, awesome sewing: Mom.
Eat your heart out, Sarah!
*for the record, I LOVE this flooring. So easy to install and it looks fantastic. One caveat for you though: there are "print runs" of the laminate. Meaning, if the dates on your boxes aren't the same, there will be colour variances among your packages of flooring! Very noticeable differences. Check your boxes before you leave the store.
Finished might be a matter of perspective. I still want to work on the quarter-round trim that can't be installed on the baseboards because the gap between the baseboard and the floor is so great the quarter-round slips beneath it. *exasperated sigh*. And.... we really need to get an electrical outlet into that room.But other than those two things, this room is D-U-N, dun.
Without further ado, I give you......... the bunk room! [oooo...... ahhhhhh!]
OK... So I'm feeling a little proud of myself with this one. I love this room! The kids love it too. For the longest time it was the only clean and tidy spot in the whole cottage. It was their refuge. I would sneak off to lie down on their new clean gooshy mattresses.
Some fun details in this room include the magazine racks installed with each bed. There isn't room in this 8'x8' closet of a room to allow for any kind of a bedside table, so these allow the kids to store their DSs (or, if you're a devious sneak like my son, the plastic bag from the chips you stole from the kitchen without asking.)
I got the idea for these here. I had the ladder trim left over from our old house in Kanata, and asked Handy Dad to cut out the side boards for me from some scrap lumber I had in the garage. Ask for cut boards, get back beautiful fabricated, filled, and sanded finished magazine racks. I just slapped a bit of paint on them to make them match the bed.
I even hung the wah wah wahhhhh seashell wall art. You know what? They're not totally awful. I might have to keep them.
OK. Time for a quick Sarah Richardson-esque cost breakdown for this room:
Big ticket items ($598):
Bed: $150 @ IKEAMattresses $170 x2 @ IKEA = $340
Flooring*: 3 boxes @ $35.76/box (we didn't use all three, but we needed more than 2) = $108
Extras ($165):
bedding -$20 (so cheap) - IKEAquilts - $32 x 2 = $64 - bed bath and beyond
magazine racks = FREE! - Handy Dad
wall paint = about $45/gallon, but I only used half, so let's say $23 - Benjamin Moore
bed paint = dang, can't remember! Let's call it $15. - Benjamin Moore
stars = $9 - White Feather
frames = $7 - Dollarama
birds = $5 ea. - Michael's clearance aisle. Score!
book box thing - urg...I think $10 - Michael's
dresser - Free - donated, formerly in D's "baby" room
Curtain - $7: fabric: IKEA (half meter), hardware: Fabricland, awesome sewing: Mom.
Total cost: $763.
Eat your heart out, Sarah!
*for the record, I LOVE this flooring. So easy to install and it looks fantastic. One caveat for you though: there are "print runs" of the laminate. Meaning, if the dates on your boxes aren't the same, there will be colour variances among your packages of flooring! Very noticeable differences. Check your boxes before you leave the store.
Thursday, May 20, 2010
This is how we roll
So I mentioned needing twin mattresses, yes? Acquiring mattresses is really the least of my concerns. The big issue is how the heck we get them to the island in a boat that's so tippy its balance shifts when you look from right to left! It's not exactly a pontoon boat.
Option A: Try to put the mattress in That Damned Boat ™. It might act as a sail. It might tip us over. Either way, it'll be a tight fit.
Option B: Pay Marvin themartian marvelous to bring the mattresses over (cost: $25).
Option C: Mooch off new neighbours yet again to have the mattresses brought over in their pontoon boat (cost: forever being labelled the island mooch)
Option D: Buy the mattresses at IKEA where they come rolled up in nifty and compact little packages. Ohmygoodnessyes.
Check this out:
Each of these tubes is 12 inches in diameter, about 3-and-a-half feet long, and weighs 20 lbs. They're SULTAN FONNES mattresses from IKEA. And they fit very neatly in the truck, in the boat, and hopefully in the kids' bunk beds!
If they work out well and are even half-way comfortable, we'll be getting the same for our room.
This afternoon I'll be picking up the paint for the bedroom and the livingroom/kitchen. Tomorrow we load up and head to the cottage for our first extended stay: A three-day long weekend with no dance practices. Heaven!
Option A: Try to put the mattress in That Damned Boat ™. It might act as a sail. It might tip us over. Either way, it'll be a tight fit.
Option B: Pay Marvin the
Option C: Mooch off new neighbours yet again to have the mattresses brought over in their pontoon boat (cost: forever being labelled the island mooch)
Option D: Buy the mattresses at IKEA where they come rolled up in nifty and compact little packages. Ohmygoodnessyes.
Check this out:
Each of these tubes is 12 inches in diameter, about 3-and-a-half feet long, and weighs 20 lbs. They're SULTAN FONNES mattresses from IKEA. And they fit very neatly in the truck, in the boat, and hopefully in the kids' bunk beds!
If they work out well and are even half-way comfortable, we'll be getting the same for our room.
This afternoon I'll be picking up the paint for the bedroom and the livingroom/kitchen. Tomorrow we load up and head to the cottage for our first extended stay: A three-day long weekend with no dance practices. Heaven!
Wednesday, May 19, 2010
Kitchen cupboards
Work is progressing on the kitchen cupboards.
Pointless aside: as a child and an emerging reader, I could never figure out what a "cup board" was in my Pippi Longstockings book. I haven't always been the razor-sharp intellectual you know and love.
The upper cupboard doors have had their facelift, and super-handy Dad has built new lower cupboard doors to match.
This weekend, Mum got the first coat of paint on the cabinets themselves. She darned near crippled herself in the process, winding up stiff and sore the next day, but she did it. Unfortunately she has to do it again this coming weekend, as a second coat of paint is needed! Bwahaha. I'm so evil.
I really don't want her crippled though, Not only because I can't imagine how we'd get her off the island and back to the car if she's unable to walk--I have visions of putting her in one of those inflatable Sumo-wrestler Hallowe'en costumes and floating her along behind the boat--but mostly because I love her and I want her whole and healthy.
Hmm. bit of a tangent there, sorry.
Once that coat of paint goes on, we can hang the cupboard doors. I still need to pick up the paint this week for the living room/ kitchen/ hall and for our bedroom.
I also need to get my hands on a lawnmower (preferably gas-powered) and two twin mattress (IKEA here we come!). Gah. I need more days in the week.
Pointless aside: as a child and an emerging reader, I could never figure out what a "cup board" was in my Pippi Longstockings book. I haven't always been the razor-sharp intellectual you know and love.
The upper cupboard doors have had their facelift, and super-handy Dad has built new lower cupboard doors to match.
This weekend, Mum got the first coat of paint on the cabinets themselves. She darned near crippled herself in the process, winding up stiff and sore the next day, but she did it. Unfortunately she has to do it again this coming weekend, as a second coat of paint is needed! Bwahaha. I'm so evil.
I really don't want her crippled though, Not only because I can't imagine how we'd get her off the island and back to the car if she's unable to walk--I have visions of putting her in one of those inflatable Sumo-wrestler Hallowe'en costumes and floating her along behind the boat--but mostly because I love her and I want her whole and healthy.
Hmm. bit of a tangent there, sorry.
Once that coat of paint goes on, we can hang the cupboard doors. I still need to pick up the paint this week for the living room/ kitchen/ hall and for our bedroom.
I also need to get my hands on a lawnmower (preferably gas-powered) and two twin mattress (IKEA here we come!). Gah. I need more days in the week.
Tuesday, May 18, 2010
More colours
While I was away last weekend at a dance competition, I took my wee girlie to a mall. With two boys in the house we're never allowed to just amble through a mall; it's commando shopping with them. Find what you need, buy it, and get the heck out as quickly as possible. We bought girlie nail polish, a cute outfit for her, and....a quilt!
I found a super deal on a lightweight quilt or "coverlet". $24.99!? Yes please! I couldn't buy the fabric for that little, let alone make it. The colors are exactly what I pictured when I saw the completed room in my head.
Here's a photo (click for close-up).
As always, I'll be pulling my colours from the dominant fabric in the room (since there's no carpet, this will be the coverlet). For those of you playing along with your BenjyMoore paint fans, the colours are:
Florida Keys Blue (2050-40), Overcast (OC-43), and I think I'm going to paint the walls "Blue Bonnet" (2050-70) with some accents (Pillows? Throw? Art? KnickKnacks? Lamp?) of "Dill Pickle" (2147-40)
Here:
Blue Bonnet
Overcast
Florida Keys Blue
Dill Pickle
Everything else will be a bright, clean white. The headboard, furniture, etc. I think I've even still got a mosquito netting from IKEA (it's probably knackered, but I'll pull it out to see) to put over the bed. I hate bugs. Bugs love me. I'm bug chocolate. If you want to ensure you never get a single bug-bite, invite me along. They'll snack on me and completely ignore you.
Anywho. Now that I have a colour palette I can start to pick up the extras and buy some paint. Progress!
I found a super deal on a lightweight quilt or "coverlet". $24.99!? Yes please! I couldn't buy the fabric for that little, let alone make it. The colors are exactly what I pictured when I saw the completed room in my head.
Here's a photo (click for close-up).As always, I'll be pulling my colours from the dominant fabric in the room (since there's no carpet, this will be the coverlet). For those of you playing along with your BenjyMoore paint fans, the colours are:
Florida Keys Blue (2050-40), Overcast (OC-43), and I think I'm going to paint the walls "Blue Bonnet" (2050-70) with some accents (Pillows? Throw? Art? KnickKnacks? Lamp?) of "Dill Pickle" (2147-40)
Here:
Overcast
Florida Keys Blue
Dill Pickle
Everything else will be a bright, clean white. The headboard, furniture, etc. I think I've even still got a mosquito netting from IKEA (it's probably knackered, but I'll pull it out to see) to put over the bed. I hate bugs. Bugs love me. I'm bug chocolate. If you want to ensure you never get a single bug-bite, invite me along. They'll snack on me and completely ignore you.
Anywho. Now that I have a colour palette I can start to pick up the extras and buy some paint. Progress!
Monday, May 17, 2010
Fish heads, Fish heads
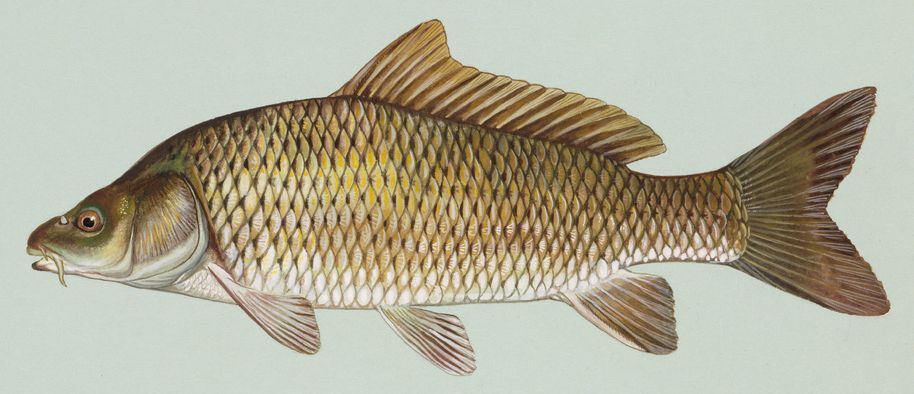
Bleh. Deceased fish. An ex-fish. Shoved off this mortal coil. He is pining for the fjords. According to Dad, it's a carp. It's huge, and it's bobbing about at the shoreline by our dock. Bleh.
How dad was able to identify this fish from the carcass bobbing there, I'll never know. It's not a tiny fish, either. The sucker is probably 5 or 6 inches thick. The kids were fascinated. Had they been able to reach it, I'm sure it would've been poked with a stick. Fortunately a hawthorn (hawthorn! hawthorn! hawthorn!) interceded.
I'm sure the presence of "Bob" the dead carp made this project all that much more rewarding. Dad and the Captain (o.k., mostly Dad) went to work adjusting the dock to eliminate the mid-dock tripping step and to pound in some reinforcing bars so the dock doesn't wobble so much. Doesn't the lake look great?
In the distance you can see several fishing boats toodling around West Grape island. (if you click on the photo like a bright bunny to view the close up)
There's a huge bass lurking at the end of our dock. We're calling her "snack".
How dad was able to identify this fish from the carcass bobbing there, I'll never know. It's not a tiny fish, either. The sucker is probably 5 or 6 inches thick. The kids were fascinated. Had they been able to reach it, I'm sure it would've been poked with a stick. Fortunately a hawthorn (hawthorn! hawthorn! hawthorn!) interceded.
I'm sure the presence of "Bob" the dead carp made this project all that much more rewarding. Dad and the Captain (o.k., mostly Dad) went to work adjusting the dock to eliminate the mid-dock tripping step and to pound in some reinforcing bars so the dock doesn't wobble so much. Doesn't the lake look great?
In the distance you can see several fishing boats toodling around West Grape island. (if you click on the photo like a bright bunny to view the close up)
There's a huge bass lurking at the end of our dock. We're calling her "snack".
Sunday, May 16, 2010
A bit of an improvement
I'm filthy and I smell of paint and bug-spray. Someone's going to have to wipe this smile off my face, though.
We had an absolutely stellar day at the lodge!
We awoke early, loaded up, drove to the Depot, gave them all our money, then headed to HPL. We met Mum and Dad at the landing and they joined us for the day. Apparently it was gorgeous outside. I couldn't tell as I spent all of it inside painting in the back bedroom. It. Looks. So. Good.
A quick refresher:
Before: a charming melange of white panelling, grey trim and a certain je ne sais quoi with the red shag carpet. (remember, you can click on photos for close ups, though in this instance you're probably better off not to)
Yesterday, while D and I were still at dance competition, the boys got the primer on the walls.
Today, I got started with the painting. Don't worry, I've already threatened revenge on my mother for not only photographing my butt (augh) but for photographing it from such an unfriendly angle when I appear to have left my neck at home. (augh augh).
The work of many hours reduced to no time at all through the magic of blog: Tada! The painting is finished! The paint is still wet in spots, that's why it's blotchy (my story and I'm sticking with it.
At about supper time, I informed the Captain that I wanted to get the floor into the room today too. He politely commented that he thought that plan was rather "ambitious" but wisely didn't say more. Otherwise, he'd have found the uncomfortable end of a utility knife jammed up his nose.
I have to confess, this "Allure" flooring is nifty stuff! It's about as thick as a piece of cardboard and you score it a couple of times with a knife and snap it to finish the cut. One edge (the grey bit you can see in the photo) has adhesive facing up. The opposite edge of each plank has adhesive facing down. Layer one sticky bit on the other, and Bob's your uncle! The flooring sticks together. You don't need any kind of underpad, and it doesn't stick to the subfloor, so it floats over most everything. It's flexible stuff, so it molds to the contours of the floor.
There is one caution I have though, and the Captain can tell you about this from first-hand experience: the adhesive is VERY sticky, so if you happen to kneel on it by mistake, you can expect to lose a neat strip of leg hair.
(Oh, I laughed until my belly hurt. Does that make me a bad person?)
What impressed me was how quickly the floor went in. We started the floor at 6:45 and by 7:30 it was done. That includes the small learning curve at the beginning as we figured out how it fit together, how best to cut it, etc. Sure, the room is only 8' x 8', but still. That's fast!
We still need to paint and install some quarter-round trim at the bottom of the baseboard, but this room, she's darned near done!
I have a few more photos of this weekend's cottage projects to share, a new raft of colour samples (this time for our bedroom), and some plans for the bathroom and next weekend in general.
Good times!
We had an absolutely stellar day at the lodge!
We awoke early, loaded up, drove to the Depot, gave them all our money, then headed to HPL. We met Mum and Dad at the landing and they joined us for the day. Apparently it was gorgeous outside. I couldn't tell as I spent all of it inside painting in the back bedroom. It. Looks. So. Good.
A quick refresher:
Yesterday, while D and I were still at dance competition, the boys got the primer on the walls.
Today, I got started with the painting. Don't worry, I've already threatened revenge on my mother for not only photographing my butt (augh) but for photographing it from such an unfriendly angle when I appear to have left my neck at home. (augh augh).The work of many hours reduced to no time at all through the magic of blog: Tada! The painting is finished! The paint is still wet in spots, that's why it's blotchy (my story and I'm sticking with it.
At about supper time, I informed the Captain that I wanted to get the floor into the room today too. He politely commented that he thought that plan was rather "ambitious" but wisely didn't say more. Otherwise, he'd have found the uncomfortable end of a utility knife jammed up his nose.
I have to confess, this "Allure" flooring is nifty stuff! It's about as thick as a piece of cardboard and you score it a couple of times with a knife and snap it to finish the cut. One edge (the grey bit you can see in the photo) has adhesive facing up. The opposite edge of each plank has adhesive facing down. Layer one sticky bit on the other, and Bob's your uncle! The flooring sticks together. You don't need any kind of underpad, and it doesn't stick to the subfloor, so it floats over most everything. It's flexible stuff, so it molds to the contours of the floor.
There is one caution I have though, and the Captain can tell you about this from first-hand experience: the adhesive is VERY sticky, so if you happen to kneel on it by mistake, you can expect to lose a neat strip of leg hair.
(Oh, I laughed until my belly hurt. Does that make me a bad person?)
What impressed me was how quickly the floor went in. We started the floor at 6:45 and by 7:30 it was done. That includes the small learning curve at the beginning as we figured out how it fit together, how best to cut it, etc. Sure, the room is only 8' x 8', but still. That's fast!
We still need to paint and install some quarter-round trim at the bottom of the baseboard, but this room, she's darned near done!
I have a few more photos of this weekend's cottage projects to share, a new raft of colour samples (this time for our bedroom), and some plans for the bathroom and next weekend in general.
Good times!
Subscribe to:
Posts (Atom)